Embarking on a journey with a camera in hand opens up a world of possibilities for capturing breathtaking moments and unforgettable scenes. Whether you’re exploring bustling cityscapes, serene natural landscapes, or vibrant cultural experiences, mastering the art of travel photography can elevate your memories from simple snapshots to stunning visual stories. This comprehensive guide delves into the techniques, tools, and considerations that will help you capture professional-quality travel photos, transforming your adventures into timeless works of art.
Mastering camera settings for travel photography
The foundation of exceptional travel photography lies in understanding and effectively utilizing your camera’s settings. By mastering these technical aspects, you’ll be better equipped to capture the essence of your destinations in any lighting or environmental conditions.
Optimal aperture selection for landscape depth
Aperture plays a crucial role in determining the depth of field in your images. For expansive landscape shots, you’ll typically want to maximize the sharpness throughout the frame. A smaller aperture (higher f-number) like f/11 or f/16 can help achieve this. However, be mindful that extremely small apertures can introduce diffraction, slightly reducing overall image sharpness.
Shutter speed techniques for capturing motion
Shutter speed is your tool for freezing action or creating artistic motion blur. When photographing fast-moving subjects like wildlife or street scenes, opt for faster shutter speeds (1/500s or quicker) to freeze the moment. Conversely, slower shutter speeds can produce captivating effects with flowing water or light trails in night cityscapes. Experiment with speeds between 1/30s and several seconds, depending on the desired effect and available light.
ISO management in varied lighting conditions
ISO sensitivity allows you to adapt to different lighting situations, but it’s crucial to balance it with image quality. In bright daylight, stick to lower ISO values (100-400) to maintain optimal image quality. As light diminishes, gradually increase your ISO, being mindful of the noise introduced at higher values. Modern cameras often perform well at ISO 1600 or even 3200, but always test your equipment’s limits beforehand.
RAW vs. JPEG: choosing the right format for Post-Processing
For maximum flexibility in post-processing, shooting in RAW format is highly recommended. RAW files contain all the data captured by your camera’s sensor, allowing for extensive adjustments in exposure, white balance, and color without degrading image quality. While JPEGs are more convenient for immediate sharing, they limit your editing potential. If storage isn’t an issue, consider shooting in RAW+JPEG to have both options available.
Composition techniques for iconic travel shots
Composition is the art of arranging elements within your frame to create visually compelling images. Mastering various composition techniques will significantly enhance the impact of your travel photographs, turning ordinary scenes into extraordinary memories.
Implementing the rule of thirds in landmark photography
The rule of thirds is a fundamental composition guideline that can dramatically improve your travel photos. Imagine your frame divided into a 3×3 grid, and place key elements along these lines or at their intersections. When photographing landmarks, try positioning them off-center for a more dynamic and engaging composition. This technique works particularly well for horizon lines in landscape shots, creating a balanced and visually pleasing image.
Leading lines: guiding the eye in cityscapes
Urban environments offer numerous opportunities to utilize leading lines in your compositions. Streets, bridges, or architectural features can serve as powerful visual guides, drawing the viewer’s eye through the image. When composing your shot, look for natural lines that lead towards your main subject or create a sense of depth and perspective in the scene. This technique is especially effective in capturing the essence and energy of bustling city streets.
Framing techniques for cultural portraits
When capturing portraits during your travels, consider using natural frames to add context and depth to your images. Doorways, windows, or archways can provide a perfect frame for your subject, offering a glimpse into their environment and culture. This technique not only adds visual interest but also helps to tell a more complete story about the person and place you’re photographing.
Negative space utilization in minimalist travel scenes
Negative space, or the empty areas in your composition, can be a powerful tool in creating impactful minimalist travel photos. By allowing ample space around your main subject, you can create a sense of isolation, tranquility, or vastness. This technique works particularly well in landscape photography, where a lone tree or a solitary figure against an expansive sky or desert can convey a powerful emotional message.
Leveraging natural light for breathtaking images
Natural light is perhaps the most crucial element in travel photography, capable of transforming ordinary scenes into extraordinary images. Understanding how to work with different lighting conditions will significantly elevate the quality of your travel photos.
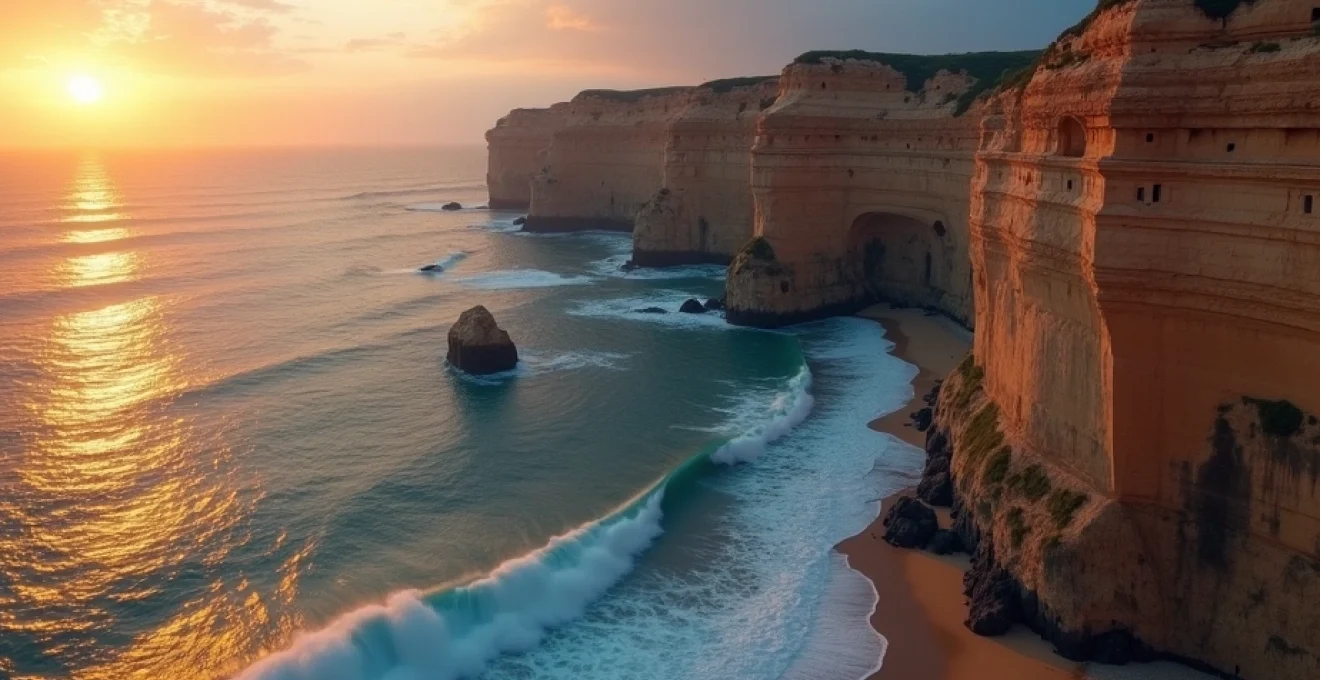
Golden hour photography at famous locations
The golden hour, occurring shortly after sunrise and before sunset, offers the most flattering natural light for photography. During this time, the low angle of the sun casts a warm, soft glow that enhances colors and textures. When photographing famous landmarks or landscapes, plan to be on location during these magical moments. The warm tones and long shadows can add depth and drama to your images, creating truly memorable shots of even the most photographed locations.
Blue hour techniques for twilight cityscapes
The blue hour, occurring just before sunrise or after sunset, provides a unique opportunity for capturing stunning cityscapes. During this brief period, the sky takes on a deep blue hue, creating a beautiful contrast with the warm artificial lights of the city. To make the most of blue hour photography, use a tripod to allow for longer exposures, and experiment with capturing light trails from moving vehicles to add dynamism to your urban scenes.
Handling harsh midday sun in tropical destinations
While midday sun is often considered challenging for photography, it can be particularly harsh in tropical destinations. To overcome this, look for ways to use the strong light creatively. Seek out interesting shadow patterns, or use the contrast to create striking silhouettes. Alternatively, focus on close-up details or move into shaded areas to capture more evenly lit scenes. A polarizing filter can also be invaluable in reducing glare and enhancing colors in bright conditions.
Long exposure methods for waterfall and seascape photography
Long exposure techniques can transform moving water into ethereal, silky textures, adding a dreamy quality to your waterfall and seascape photos. To achieve this effect, use a sturdy tripod and a neutral density filter to allow for longer exposure times, typically between 1 and 30 seconds depending on the water’s speed and the desired effect. Experiment with different shutter speeds to find the perfect balance between smooth water textures and maintaining detail in the surrounding landscape.
Essential travel photography gear and packing strategies
Selecting the right gear for your travel photography adventures requires balancing versatility, quality, and portability. While it’s tempting to pack every piece of equipment you own, a carefully curated kit will serve you better on the road. Start with a versatile zoom lens that covers a wide range of focal lengths, such as a 24-70mm or 24-105mm. This will handle most travel photography scenarios without the need for constant lens changes.
Consider adding a wide-angle lens for landscapes and architecture, and a prime lens for low-light situations and portraits. A lightweight travel tripod is essential for long exposures and low-light photography. Don’t forget extra batteries, memory cards, and a reliable backup solution for your images. For those venturing into more adventurous or remote locations, a weather-sealed camera body and lenses can provide peace of mind in challenging conditions.
When packing, distribute your gear across multiple bags to minimize the risk of loss or theft. Use padded inserts or dedicated camera bags to protect your equipment, and consider carrying your most essential items in your carry-on luggage when flying. Remember, the best camera is the one you have with you, so prioritize gear that you’re comfortable carrying and using throughout your journey.
Post-processing workflows for travel photographers
Post-processing is an integral part of modern travel photography, allowing you to refine and enhance your images to truly reflect the beauty and emotion of the scenes you’ve captured. Developing an efficient and effective workflow is key to managing the large volume of photos typically generated during travel.
Adobe lightroom presets for consistent travel collections
Adobe Lightroom is a powerful tool for organizing and editing your travel photos. Creating or utilizing presets can streamline your workflow and help maintain a consistent look across your travel collections. Start by developing a set of base presets that align with your personal style, then adjust these for specific lighting conditions or destinations. This approach allows for quick edits while still maintaining flexibility for fine-tuning individual images.
Selective adjustments in capture one for Location-Specific edits
Capture One offers advanced color editing tools that can be particularly useful for travel photography. Use layers and masks to make selective adjustments, allowing you to enhance specific elements of your image without affecting others. This is particularly useful for balancing exposure in high-contrast scenes or bringing out the unique colors of different locations. Experiment with Capture One’s color balance tool to fine-tune the mood and atmosphere of your images to match your memory of the scene.
HDR merging techniques for High-Contrast scenes
High Dynamic Range (HDR) techniques can be invaluable when dealing with the challenging lighting conditions often encountered in travel photography. By merging multiple exposures, you can capture detail in both highlights and shadows that might be lost in a single exposure. Modern HDR software allows for natural-looking results that faithfully represent the scene as you experienced it. When using HDR, aim for subtlety to avoid an over-processed look that can detract from the authenticity of your travel images.
Color grading methods to enhance destination atmosphere
Color grading is a powerful way to enhance the mood and atmosphere of your travel photos, helping to convey the unique feel of each destination. Use split toning or color balance adjustments to add warmth to sunset images or coolness to arctic scenes. Pay attention to the cultural and geographical context of your images when color grading; for example, the rich, warm tones of a Moroccan market will differ significantly from the cool, muted palette of a Scandinavian fjord.
Ethical considerations and legal requirements in travel photography
As a travel photographer, it’s crucial to approach your craft with respect for local cultures, environments, and legal regulations. Always research the photography laws and cultural norms of your destination before your trip. Some locations may have restrictions on photography, particularly at religious sites or government buildings. When photographing people, especially in cultures different from your own, always ask for permission and be prepared to respect a refusal.
Be mindful of your impact on the environment and wildlife. Avoid disturbing natural habitats or altering scenes for the sake of a photograph. In popular tourist destinations, consider how your actions might affect the experience of others. Drone photography, while offering unique perspectives, is subject to strict regulations in many countries. Ensure you’re familiar with local drone laws and always prioritize safety and privacy.
Finally, consider the ethical implications of how you present your travel photography. Strive for authenticity in your images and captions, avoiding misleading edits or descriptions that could perpetuate stereotypes or misrepresent a destination. By approaching travel photography with ethics and respect, you not only create more meaningful images but also contribute positively to the places and communities you visit.